
What is 192.168.2.1
The Default Private IP 192.168.2.1
192.168.2.1 is the gateway, or private IP that the manufacturer of your wireless router assigned to the device at the assembly line. The private IP is a crucial part of any Wi-Fi network because it facilitates communication between the router and the other internet-capable devices on the network. Once this channel of communication is ensured, the router uses the Internet Service Provider (ISP)-assigned public IP to communicate with the World Wide Web.

How To Check Your Private IP
If you are not sure if your router’s private IP is 192.168.2.1 or something else, there is an easy way to check. The first thing to do is to look at the label on the back of the device. Listed here should be the default private IP, as well as the default logins for the user panel. Try if 192.168.2.1 will bring you to the login screen for the router’s settings panel. If the label says the local IP should be 192.168.2.1 but it doesn’t work, don’t rush into factory resetting the device. Use the factory reset option as a last resort only, because it rolls back all changes you or your ISP has made to the Wi-Fi network.
To check if your router’s private IP is 192.168.2.1 is something else and be a hundred percent certain of it, you are going to need an internet-capable device. The exact method depends on the OS the device is running, but all are straightforward enough.
Checking the private IP on Windows
Go to the search bar next to the Start button and type “cmd”. Open the Command Prompt and type “ipconfig” in the console. Hit Enter and you will see the information about your wireless network on the screen. Your router’s private IP, such as 192.168.2.1, will be listed next to Default Gateway.
Checking the private IP on Mac OS X
Click on the Apple Icon and choose System Preferences from there. Next, open the Network menu and find the wireless network you are connected to on the left-hand side of the screen that pops up. Click on the Advanced button and go to the TCP/IP tab. The private IP address, like 192.168.2.1, will be listed in the Router field.
Checking the private IP on Linux
Go to your notifications area and click on the Network icon. Look for a button saying something like Connection Information or Network Settings. The exact name of the field you are looking for may vary depending on the distribution that you are running. In any case, once you find the menu you need, your router’s private IP address (192.168.2.1, or anything else) will be listed next to the Default Router/Gateway field.
How To Access Your Router’s Admin Panel
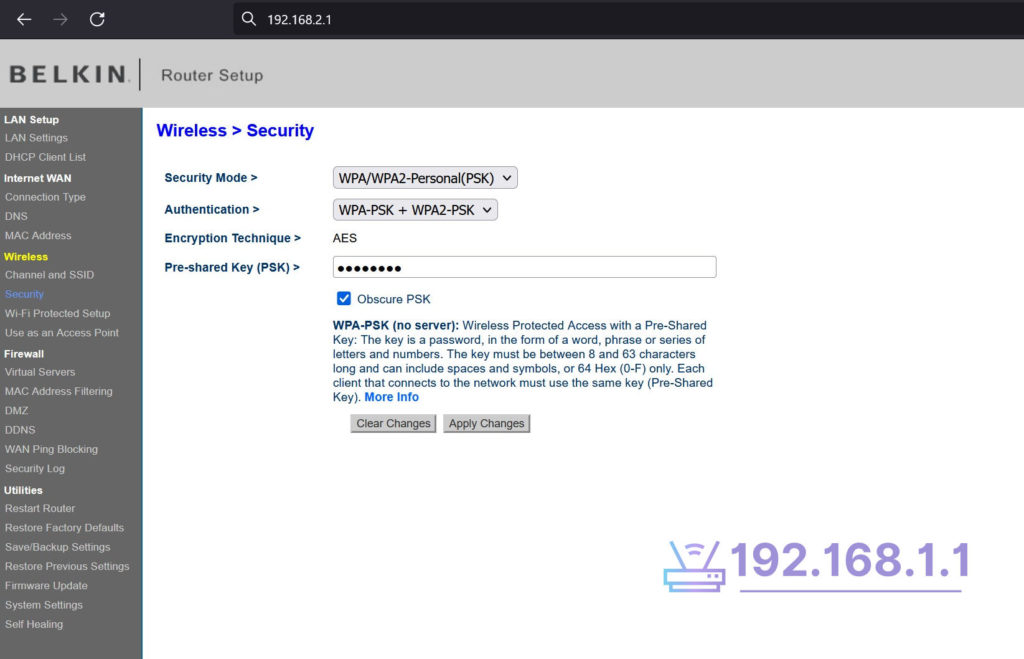
Once you are certain that your device’s gateway IP is 192.168.2.1, or something else, you are ready to log into the admin panel and make the changes you need. To do so, go to your favorite Internet browser. Type 192.168.2.1 (or whatever your private IP turns out to be) and hit enter. Use the default logins, or the ones set up by your ISP to access the admin panel on the page that loads. The admin panel may look differently depending on the brand and model of your device, but all commercially-sold routers have more or less the same settings.
Personalize the Wi-Fi network
You can pick up a name for your wireless network to make it stand out among others within range. It is highly advisable to set up a strong password for the network as well. In that way, you will prevent people from using your Wi-Fi without your permission.
Change the Logins
Anyone who knows your router’s private IP is 192.168.2.1 can easily find the default logins for the admin panel. With that, they have full control of your network, which poses a host of security risks. The fastest and surest solution is to change the default logins and set up a strong password that will be hard to break. Experts suggest using at least 12 characters in a combination of upper and lowercase letters, numbers, and special characters.
Change the Default Private IP
If you want to really up the security of your network, consider changing the router’s gateway IP as well. You can do that from the Network Settings tab. Just make sure you write down the new private IP you choose because once you save the changes, you will no longer be able to access your router’s admin panel at 192.168.2.1.